


Codex Books
Codexes are the traditional form of book with multiple signatures and a hard cover. They can be bound in paper, cloth, leather or other materials, and are complex to design and build.Tools:
- scissors
- pencil
- ruler
- cutting mat
- needle
- awl
- book press or very heavy weight
- 1 piece cover paper (size depends on the page size and book thickness)
- 1 piece cardboard (size depends on the page size)
- 2 pieces endpaper (the same size as the page size)
- double-sided page paper
- glue
- stiff ribbon about 1/2 inch thick (about three times the width of a sheet)
- heavy thread (size depends on the book height and thickness)
- decorative ribbon for bookmarks and ties
- scrap paper
Designing the Pages
Codex books are made up of signatures, or a small group of pages folded and stitched together in a manner similar to a pamphlet. The number of pages the book will have will always be a multiple of four, but the first page of the first signature and the last page of the last signature will always be blank, as they are used to attach the group of signatures (or text block) to the cover.To calculate the layout for a codex, decide how many sheets of paper will be in one signature. Generally, this number is around 3 - 8 sheets, to prevent the edges from fanning out too far when stitched. Each signature will have four times as many pages as the number of sheets. The calculator on the pamphlet page can be used to lay out each signature. Remember to leave the first page of the first signature and the last page of the last signature blank.
The text block must be stitched and pressed before the cover dimensions of the book are known. The amount of thread needed is about the height of the page plus a quarter of an inch times the number of signatures plus an extra four inches for tying off the knots. The length can be calculated below:
Assembling the Book
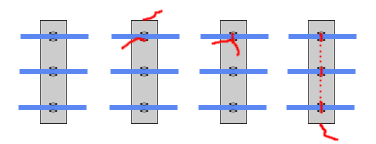
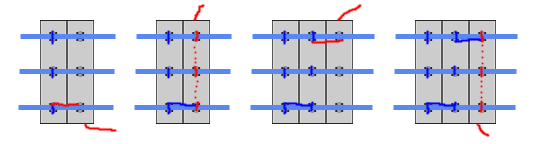
Sewing the text block:After printing and assembling the signatures, put them together and press them flat. Make sure they are perfectly aligned. Cut three pieces of the stiff ribbon so that they are about an inch shorter than the width of a sheet. Space them evenly along the height of the book with the top and bottom ribbons no closer than about a half inch from the top and bottom edges of the book. Mark the edges of the ribbon precisely across the back of all the signatures. Open each signature flat on the cutting mat and poke holes where the marks are.
Take the first signature and lay the ribbons along the spine with the holes to either side. Sew into the second hole from the top, leaving a tail on the outside. Sew out the top hole and back into the second hole (around the first ribbon) and tie a knot. Sew out the third, in the four, out the fifth and in the sixth, making a running stitch down the spine and going over the ribbons on the outside of the signature.
Making the cover:
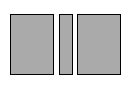
Cut three pieces from the cover board. The two cover pieces should be a quarter inch taller than the height of a page and a quarter inch wider than the width of a page. The spine board is the same height as the cover boards and exactly the width of the spine of the text block. The height of the cover paper is the height of the cover boards plus two inches. The width of the cover paper is the twice the width of the one of the cover board plus the width of the spine, plus two and one quarter inches. All of these can be calculated below:
 |
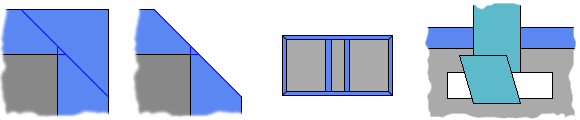
Center the boards on the back side of the cover paper with the spine board in the middle and an eighth-inch gap between each of the boards. Mark the edges of the boards on the paper. Measure out the width of the board from each edge at the corners and draw a line at a 45 degree angle to the corner. Remove the cover boards, cut off the corners, and apply glue to the back of the cover paper. Place the cover boards on the cover paper, and fold the ends up.
Place the cover under a weight until it dries.
Take one of the endpapers and fold the sheet in half width-wise to make two pages, with the side that will show on the inside of the fold. Glue the back of one of the pages to the first page of the first signature. Glue the back of the other page to the front cover, lining up the back edge of the endpaper with the back edge of the front cover board. The text block should line up with the back edge of the front cover board. Repeat with the other endpaper, the last page of the last signature, and the back cover.
Place the cover under a very heavy weight or in a book press until it dries.