


Stab Bound Books
Stab binding produces elegant looking books and allows a great deal of flexibility in paper choice and layout. There are a number of beautiful binding patterns available. The Four Hole pattern and three variations are given here.Tools:
- scissors
- pencil
- ruler
- cutting mat
- needle
- awl
- 2 pieces heavy-weight cover paper (size depends on the page size and cover style)
- single or double-sided page paper
- heavy thread - pearl cotton embroidery floss works well (amount depends on stitching)
- thin cardboard (the same height as the page paper and one eighth inch shorter than the width)
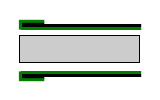
- paper or linen tape (the same height as the page paper and at least one half inch wide
- 2 pieces decorative end paper (one half inch shorter and narrower than the page size)
- glue
- weight (such as a heavy book)
Designing the Pages
Stab-bound books are sewn together on one side of the pages, so extra margin space is needed on the side to be bound. If single-sided paper is used, the backs will be blank. If double-sided paper is used, the extra margin for the binding will alternate sides. Left-hand pages will have the extra margin on the right. Right-hand pages will have the extra margin on the left. The amount of extra margin needed depends on how stiff the paper is. Generally, an inch and half is needed.There are two choices for the cover - paper with a fold-over or paper covered boards. For the fold-over version, the cover paper will need to be a quarter inch taller than the book and wider than the book by an inch and a half. For the board version, the cover paper will need to be two inches taller and two and one eighth inches wider than a page.
Assembling the Book
After printing the pages, assemble them in order.For the fold-over cover:
 Place the cover paper right side up with the edge to be bound at the left. Fold up an inch and a quarter of the paper on the left-hand side of the paper. Repeat with the other sheet. Place one cover sheet on the cutting mat with the folded side down and center the stack of pages so there is an eighth inch gap on all sides. Place the other cover sheet on the stack folded side up. leaving an eighth inch gap on all sides.
For the board cover:
Cut one inch off of the width of one cover to make two pieces. Place the pieces with a one eighth inch gap between them and tape with paper or linen tape. Center the taped boards on the back side of one of the cover pages and mark the edges of the board.
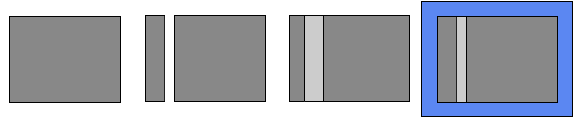
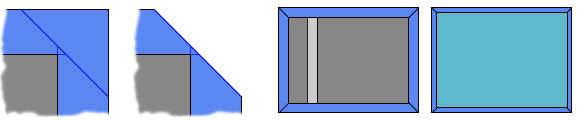
Measure out the width of the board from each edge at the corners and draw a line at a 45 degree angle to the corner. Remove the cover board, cut off the corners, and apply glue to the back of the cover paper. Place the cover board on the cover paper (tape side down), and fold the ends up. Apply glue to the top of the board and place the end paper sheet right side up on the board. Place the cover under a weight until it dries. Repeat these steps with the other cover board.
After the boards are dry, center the pages between the boards.
For the either cover:
Choose a binding pattern to complete the book:
- Four Hole Binding - Using four holes, this is the simplest of binding patterns and the basic pattern on which the remaining variations are based.
- Kangxi Binding - Using six holes, this variation strenghens the corners of the spine and is a variation of the Four Hole pattern.
- Hemp Leaf Binding - Using nine holes, this variation strenghens the entire spine and is a further variation on the Kangxi pattern.
- Tortoise Shell - Using twelve holes, this variation is a highly decorative version of the Four Hole pattern.